Do you have a toilet or bed room doorway in desperate want of substitution? No matter whether you are dealing with a dated design or a broken body, swapping out a door can be an outstanding way to upgrade the decor and ease and comfort of a space.
Hanging a door is simple, but it is effortless to make mistakes if you forget slight specifics. We’ll stroll you by means of how to put in a pre-hung door in seven methods and what you can do if you want to replace only the door slab. With this guide on setting up an interior doorway, you are going to make certain a clean set up and a appropriately working finished solution.
How to Install a Pre-Hung Interior Door
If you are changing a doorway and body in a tough opening, you will want to use a pre-hung door. Evaluate the area and buy a doorway with the right measurement and swing direction.
Tools You’ll Need
Preparation: Check the Floor and Door Opening
Just before hanging your doorway, you’ll need to check that the floor is amount and that the pre-hung doorway will suit in the opening. The doorway opening need to be around 1–2 inches wider than the new door frame.
To verify if the flooring is stage, spot a box level on it in entrance of the door opening. If the floor is uneven, slide a shim beneath the degree right up until the bubble is centered.
Evaluate the hole between the flooring and the stage on the facet that you shimmed. You will want to lower that significantly off from the new door jamb on the opposite facet. For illustration, if there is a hole from the ground to the level of ⅛ of an inch on the left, you will have to shave ⅛ of an inch off the appropriate side door jamb.
If the doorway frame is way too long, measure the distinction to get it to match. Minimize the extra off the bottom of the doorway jambs with a circular saw.
How to Install an Interior Door (7 Steps)
1. Insert Pre-Hung Door in Door Opening
Spot the pre-hung door in the door opening, retaining the edge of the jamb flush with the wall. Take away the doorway plug from the latch hole. Swing the door open up ninety degrees and location a block or shims underneath it to prevent the fat from pulling the doorway frame out of area.
Examine the prime jamb to guarantee that it is amount. If you lower the side jamb accurately to account for any deviation in the flooring, the best should be good, and the doorway will latch effectively. As soon as it looks great, make certain the facet jamb is plumb on both sides.
2. Set Shims in Place
Incorporate shims among the facet jambs and studs. Because the shims are tapered, you will want to operate two of them in reverse directions to stop the door body from twisting as you fill in the gap. You can adjust the width of the shims by sliding them alongside a single an additional.
Add at minimum 3 sets of shims on the two sides of the doorway, placing them just earlier mentioned the hinges on the swing facet and around the exact same place on the latch side. The shims must suit snug but not adequate to drive and bend the door body.
3. Attach the First Set of Nails
Once the shims are in area and the jamb is amount, you can commence securing the body in spot.
Making use of a brad nailer or hammer, set two 8d nails into the leading segment of the swing side jamb, driving them through the doorway body, the shims, and the wall stud. Position the nails one-inch from the edge of the door jamb, stacking a single about ½ an inch on top of the other. Repeat the procedure on the other aspect of the doorstop so that four nails are going by means of the top section.
4. Level and Nail Hinge Side
Right after securing the door frame at the top established of shims, you can attach the center and reduce sets of hinge jamb shims in the same way. Before nailing in the relaxation of the hinge facet, you’ll have to ensure that the jamb is in the suitable position.
1st, use your amount to see if the jamb is plumb. Then, test the door by opening and closing it a number of times, checking that the door swings easily and the latch strains up.
When the door is closed, seem at the hinge aspect reveal (the hole amongst the doorway slab and the door body) to guarantee it is even from best to bottom. If it isn’t, the jamb is bent in some way, and you’ll require to widen or slim the shims to straighten it out.
Search at how the doorway slab hits the doorstop on the latch facet when the doorway is closed. The door should contact the doorway quit from top to bottom. You will need to alter the jamb to repair any uneven or extremely big gaps.
When almost everything seems great, nail four 8d nails into the middle segment and four a lot more into the reduce one particular.
5. Secure Shims to Strike Side
Now that your hinge side is secure, you can get rid of the block underneath the door and let it to swing freely. The doorway must sit nonetheless in which you location it. If it drifts open or closes when you permit go, it indicates that the hinge side is not properly plumb and requirements adjustment.
When you’re all set to secure the strike facet, commence at the top area, nailing 4 8d nails through the jamb, the shims, and the wall stud like you did on the hinge side.
Shut the doorway, and check out that the reveal on the strike aspect is even from prime to base. Adjust the shims as needed till the expose is even. Travel 8d nails through the remaining sections on the strike side to complete the body installation.
6. Remove Excess From Shims
After nailing in the doorway frame, near the doorway to see if the expose is even on the best and sides. Up coming, use your utility knife to take away any excess shim jutting out earlier the wall. Score the shim flush with the doorway frame and snap it off at the line.
7. Finish Door with Accessories
Pre-hung doors do not frequently arrive with knob and latch components, so you will require to buy them individually.
If you’re getting a door lever, make positive it is the appropriate orientation for your doorway swing. Likewise, though the doorway comes with hinges, you could want to purchase new ones to match the door deal with or lockset. Note the form of the doorway hinges, as some have sq. corners and other people have rounded corners. If you buy the mistaken hinge shape, it will not operate with the doorway.
After adding the doorknob and strike plate, your doorway is all set to use. All that is still left is to include trim and a crosshead as sought after, utilizing 6d ending nails to drive them into the wall studs.
How to Install a New Door in an Existing Frame
When you have a ruined doorway slab but the body is intact, you can save money by changing only the slab. The approach of swapping a doorway slab requires far more woodworking talent than putting in a pre-hung doorway.
Tools You’ll Need
Preparation
Before getting a new doorway, you have to evaluate the old doorway so you can order the proper size. It’s ok if the new door is slightly taller than the old doorway due to the fact you can trim the excess later on, but the width should be identical.
How to Install a New Door in an Existing Frame (9 Steps)
1. Mark and Remove the Old Door Slab
Before having off the old doorway, evaluate the gap in between the floor and the base of the doorway and observe it. You are going to use this to dimensions the new door slab.
Unscrew the aged door slab from the hinges and set it apart. Just take one hinge off the door body so you can use it as a reference when ending the new doorway slab. Established all hinge hardware aside if you strategy to reuse the old hinges.

2. Lay Old Door on the New Door
Lay the aged door slab on the new door slab, orienting them in the very same direction so that the hinge sides align. Use clamps on both end of the stack to keep them in location as you perform.
If the previous door is somewhat shorter than the new doorway, use your pencil to mark off any extra on the base of the new slab. You can trim the bottom of the door later.
Notice that you only want to make the doorways the identical peak if the outdated slab was the proper top off of the floor. If the previous doorway had a gap greater than approximately ⅛ of an inch, you will want to make the new slab somewhat longer. You want to keep the distance from the base of the slab and the flooring as shut to ⅛ of an inch as possible.
3. Measure Mortise Length and Location
Line your mix square up with the edge of the hinge mortise on the previous slab. The mortise is the indentation that holds the hinge. With the sq. as a manual, draw two strains down the new slab indicating exactly where to cut the mortise sides.
Subsequent, evaluate the width of the hinge mortise with your sq. and transfer the measurement to the new door. You should now have 3 marks outlining the position of the hinge on the new slab.
If you really do not have a combination sq., you can use a straightedge and a tape evaluate to make the define. Measure the length of the sides of the hinge mortise from the top of the doorway. Transcribe people measurements to the new slab, employing a straight edge as a information.
4. Measure Mortise Depth
Employing your hinge as a guide, mark the shallow depth of the mortise on the new slab. It will be crucial to keep away from likely past this line when chiseling out the mortise.
5. Outline and Score the Hinge
Place the previous hinge in excess of the define you marked on the new hinge, lining up all of the edges. Draw all around the edge of the hinge to make a full outline for the new mortise. Use your utility knife to score the define down to the depth of the mortise line.
6. Chisel the Mortise
Cut several parallel reduction traces about ½ an inch aside between the sides of the mortise outline. Make confident you don’t cut further than the hinge depth.
Chisel out the mortise, operating from 1 reduction line to the up coming until it’s entirely cut out. Right after forming the mortise, place the hinge in spot to check the suit and mark where the screws will go in.
Repeat this method to comprehensive the center and base mortises.
7. Drill Pilot Holes and Attach Hinges
Drill pilot holes for the center screw on the leading and base hinges. Situation the doorway in place and connect it to the doorway frame with only these screws. Verify the door procedure to ensure it opens and closes effortlessly.
8. Attach the Doorknob
Eliminate the door to connect the knob and latch. You can use the previous doorway as a guidebook to mark the placement of the latch plate and knob gap.
Adhere to the installation guidelines that come with the new knob. A doorknob installation package will have everything you require to bore out the holes for the knob. When drilling out the hole for the knob, drill only halfway by means of on one particular side and then halfway by means of on the other to avert splintering.
9. Attach the Door
When the doorknob hole is minimize, you can paint the doorway your wanted coloration just before attaching any hardware.
Attach the door at the leading and base hinges in only the centre hole. Test the door to ensure it opens, closes, and latches appropriately. Finish up by setting up the remaining screws in the hinges.
Conclusion
Replacing a doorway can seem like a complicated process. But when you adhere to the methods outlined here, you are going to be shocked at how easy it is to refresh the seem of your entryways!
If you have low-cost, boring doorway patterns or worn-out items, a new door is an outstanding way to spruce up an inside room. By taking it into your own palms, you can save cash on installation fees and wander away content following completing a productive Do it yourself task.
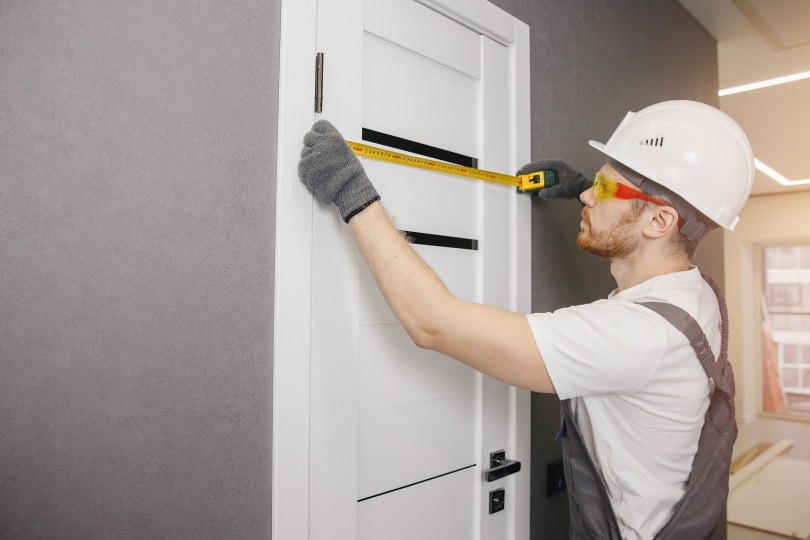
Showcased Image Credit rating: ungvar, Shutterstock
Contents