Redoing the cupboard doors can be a excellent Diy task that has the electrical power to change the feel of your residence in a large way. The experience of delight you’ll get when you explain to people you did them by yourself is usually genuinely wonderful way too. We’re heading to seem at a few of wood-signing up for techniques that you can use to construct a spectacular set of shaker cabinet doorways.
The only electricity tools you are heading to want are a desk observed and a handheld drill. You can even lease them at most massive box components merchants if you do not have one particular on hand. When it comes to saws and energy resources, always make sure that you know how to use them and in no way do some thing you are not comfortable with. Let’s have a appear at what we’re going to need to have:
How to Make Cabinet Doors in 9 Steps
1. Gather Supplies
At the heart of what we’re going to be carrying out is studying a couple of various approaches to join wooden, without the use of pinholes, nails, or screws. Seeing as you need to have a table observed no subject what, we’re heading to go over a different variety of blade that you can set on it called a dado. If you don’t want to operate out and get a single, you can still make these cuts, it is just heading to be far more time and function.
2. Tools
- Table Saw: It’s nice to back this up with a circular saw as well if you have one, but you can make do without- we’ll elaborate below.
- Dado Blade: You don’t 100% need it, but it sure does help. This is a special blade for your table saw which allows you to cut wide grooves which are called dados. You also need the right throatplate that allows the wider blade-set through as well—an important detail.
- Drill: You’ll need a power drill with a hole saw attachment if you want concealed hinges.
- Glue: Wood glue of your choice—you’ll want to make sure it has a small nozzle to apply inside the thin grooves.
- Clamps: You’ll need a few clamps—the more the merrier. Bessy clamps, aka C-clamps, are perfect. Make sure that they are long enough to clamp the whole door. A couple of 4’ Bessy clamps will do.
- Tape Measure, Square, Pencil: The usual suspects. Always critical.
- Stain, Paint, etc.: This is a matter of personal preference. You don’t NEED to put anything on it if you don’t want to, but it does help protect the wood.
- Hammer, Chisel, Sandpaper: These are for the micro-adjustments to the fit and touch-ups.
Hardware
No matter whether you choose you would like to go with euro-type hinges or not is a make a difference of choice. Euro-type hinges do have a few of benefits—they are hid, and a minor less complicated to set up. The handles will again be a subject of personal choice. Any handles you decide up at your neighborhood hardware retailer will be straightforward to put in and far more than most likely come with a established of directions.
Lumber
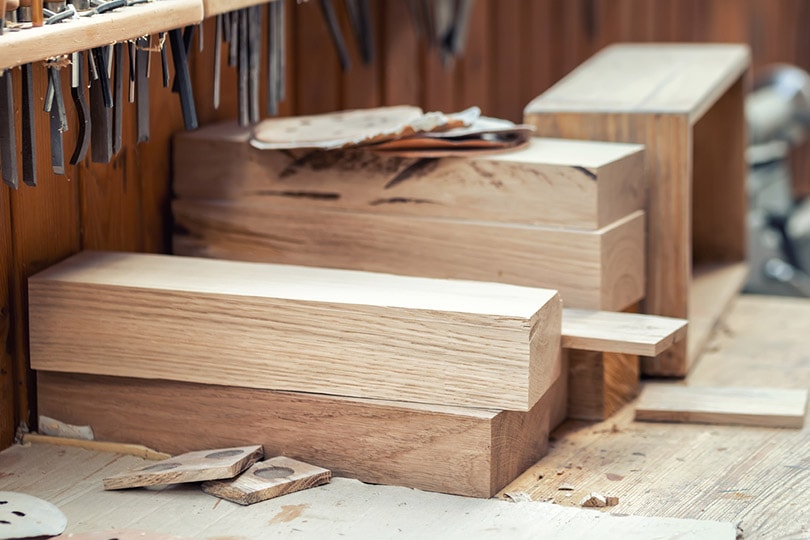
You’re likely to want to get straight pieces of 1×3 for your rails and styles. The rails are the horizontal items of our cabinet doors, and the variations are their vertical counterparts. It is usually advisable to get your lumber from a provider that will enable you to choose your very own boards, that way you can sight the edge and choose out some great parts.
Next, you are likely to need some quarter-inch plywood. You can select some quality “A” or “B”, which is pricier but has been sanded down for a smoother end which is nicer for painting. You really don't need to have to go that pricy if you really do not want to though, staining normal quarter-inch plywood provides out the grains and looks gorgeous.
3. Rip Boards to Width
Utilizing the normal blade on your table observed, established the fence to rip your 1x3s down everywhere from 2” to 2 ½”. Although the standard measurement is 2¼”, the enjoyable of carrying out it by yourself is determining how you want it to seem. You are going to want to lower by yourself a modest test piece for the following stage.
4. Creating a Groove
A regular observed blade has a thickness of ⅛ of an inch, fifty percent that of our plywood. To notch out a ¼-inch groove using the table observed is a simple trick. Set the height of the blade at ½-inch. Then, make your heart mark on the conclude of your ripped down 1x3s. Now, set the fence of the noticed so that the blade is just touching the line. If you’ve accomplished the math, then you know what’s coming.
You’re heading to make the groove by making two passes and flipping the board about on the 2nd pass. Utilizing the check piece, make sure that the fence is established correctly. When you’re confident it is very good, notch all your boards.
5. Cut Rails and Styles to Length
When reducing the lengths of your boards it is critical to guarantee that your take your time and make a square minimize. If the lengths are not squared correctly the cabinet will not arrive jointly in the finish.
The styles are cut to size, but the rails will need to have an further ¼-inch on every single stop. Just take the time to make these cuts ideal. This is for the piece that will slot into the groove of the types, which is known as a tenon.

6. Cutting Tenons
This is in which a dado blade set is likely to arrive in useful. If you are fortuitous to have one particular, then this next action is likely to be a breeze. Install the dado. We’re heading to leave that up to you, your desk saw, and your dado manufacturer, but always be positive the set your buying is compatible. It is a headache and even marginally embarrassing when you need to go back again to the hardware store and make clear why you need to return it.
Next, it’s time to mark out the tenons. The tenon is going to be a tongue on each and every end of the rail, which is ¼-inch thick and protrudes ½-inch out. You are going to require to set the depth of your dado to just the height of the groove. Now, you also want to established up a sacrificial board on the fence of your table saw which sits over the dado. This is so you can run the stop of the piece you are slicing more than the blade set and maintain it butted square up in opposition to the board.
If you really don't have a dado, you can even now minimize the tenons with a typical blade and many, several a lot more passes. Or else, the process is basically identical. There is nothing mistaken with using a typical blade, but it can leave the edges a minor rough and jagged. You can easily correct that if you need to—just touch them up with some sandpaper.
Take a look at the match and make any micro-adjustments necessary. The shoulders and conclude of the tenon need to all merry up to the groove in the design with no gaps.
7. Cut Plywood to Size
This is where the round noticed comes in helpful. If you are reducing off a big piece, it’s excellent to cut it down to inside of an inch of the true measurement initial. Then, you can mill it far more precisely on the table observed without having dealing with ungainly, uncomfortable, and hazardous cutoff parts which can cause the blade to bind and kick.
Or else, you can use the table noticed to get the plywood down to the measurement you need—it will just be a minor a lot more time-consuming.
8. Stain, Paint, or…Don’t
After you have all your parts milled and have accomplished a dry-in shape, it’s a good time to use any stain or paint. You can usually do it soon after assembly as nicely, so there is no hurry. Numerous individuals like to leave them unfinished, but a nice stain can also truly bring out the all-natural beauty.
9. Installing the Hardware
If you are going to put in typical hinges, then that process is fairly uncomplicated. If you want to set up inset hinges, you are going to need a router. Normally, structure the hinge positions, drill pilot holes for the screws (brain your depth) and screw the hinge on.
For euro-type concealed hinges, lay out the place of your hinges. These call for a spherical inset which you will use the hole-observed to generate. Often comply with the manufacturers’ guidelines with regards to the proportions. Then, use the hole noticed attachment on your electricity drill. Make sure you mark out the right depth on the facet of the observed.
There are also specially created jigs for this purpose which you can acquire. Alternatively, you can make your personal jig by using a scrap piece of wooden, laying out the pitch and depth of the holes on it, and clamping it to your cupboard door. Using the holes as your guide will assist in trying to keep the hole observed plumb as you drill, so you can concentrate on getting the depth correct.
You can put in the handles now if you desire or soon after the doors are hung. Ready until soon after is usually a very good notion. Which is simply because there are typically ergonomic items that we do not think about. It is not until finally we reach up or down to the cabinet, and recognize hey, I may have appreciated to have that deal with a pair of inches left or appropriate, up, or down.
When you have received your hardware on the cabinet doorways, it is time to cling them!
Conclusion
Updating your cupboard doors is a excellent way to freshen up the space at home. New cabinet doors immediately modify the atmosphere—and there is practically nothing like that distinctive scent of refreshing-lower lumber and glue that will come with new cupboards. It is the property improvement edition of that new-auto odor.
With some fundamental carpentry and joinery information and a number of fundamental tools, you can preserve some cash and get pride in obtaining constructed your personal new cupboard doors. Content constructing!
Highlighted Graphic Credit rating: Benoit Daoust, Shutterstock
Contents