Just before you commence tearing off the shingles on your roof, make positive it is value the value-saving. Performing it oneself can preserve you amongst $one,000 and $3,000, but it is a great deal of tough function and does need some fundamental and some intermediate instruments to get the occupation accomplished appropriately. It also requires functioning at top, and specifically facing down the roof, so if you aren’t comfortable carrying out this, you will want to get a specialist contractor in.
Once accomplished and the shingles are off, you will be in a position to transfer on to buttoning up the roof with a h2o barrier and felt.
- Brooms
- Hammer tackers
- Hammers
- Ladders
- Nails
- Pry bar
- Roof jacks
- Roofing shovel
- Staples
- Tarpaulin
- Plywood sheets or scaffolding boards
- Roofing felt
- Ice and water barrier
What Is The Best Tool For Removing Shingles?
The really greatest resource for shingle removing is a roofing shovel. It has a for a longer time and narrower head than a shovel and also has a serrated end that will properly get rid of the roofing nails at the very same time as the shingles.
Most individuals do not have a roofing shovel, however. You can try making use of a regular square shovel but it could just take a small a lot more operate making use of 1 of these. A backyard fork can also be utilised.
How Long Does It Take To Take Off Shingles?
Generally, it will take a expert staff of 4 or 5 people one day to tear off shingles and clean up the spot. If there are two of you with small or no knowledge, you can assume it to take several days to a 7 days. This is exactly where the tarpaulin can show incredibly beneficial because it will prevent the roof from receiving damp right away.
Removing Old Shingles
1. Prepare
You want to prepare and prepare to get rid of shingles so that you can ensure you have almost everything all set for the removal, but also so that you are geared up for the set up of the new shingle roof.
Preferably, you will want a dumpster or other massive waste container, and this will want to be booked in advance. Try out and get it as close to your property as achievable, and preferably at the side, so that you can toss shingles from the roof and into the container with no obtaining to get off the roof to do it. This will minimize the work time down significantly.
Despite the fact that the weather can be unpredictable, you will want to do the operate when it is dry simply because damp, sloped roofs are incredibly perilous, and leaving a roof exposed to the factors with out any security can lead to lengthy-expression harm.
Making ready in this way also allows you to rope in household and pals to support. Eliminating shingles is a massive job and a single that you won’t want to tackle by yourself.
Make sure you have all the essential things prior to you start off since the last thing you want to have to do when you are midway by way of a roofing job is head to the hardware store for a roofing shovel or an additional forgotten item.

2. Install Roof Jacks and Prepare the Roof
Roof jacks can be used to stand on, but they are also employed as a system to capture slipping shingles just before they reach and potentially injury your guttering and something below the roof of your home.
Nail the jacks beneath the segment you intend to very clear initial and make certain that they are powerful and durable ample to prevent the shingles and you from sliding off the roof. Guarantee the jacks are nailed into rafters using suitable nails.
Protect the air conditioner with plywood to stop any hurt and set a tarp over shrubs, trees, and something else that could be destroyed by traveling debris. Even with jacks in spot, it is very likely that some particles will uncover its way to the floor.
3. Be Safe
Use lengthy trousers, function boots, and long sleeves. The roof will get hot, even if the temperature isn’t also substantial outside the house. Set on safety glasses and put on a safety harness that attaches to an anchor at the prime of the roof. There is no these kinds of issue as currently being as well mindful when working on the roof.
4. Start at The Top
Start off at the really peak of the roof and start as significantly absent from the dumpster as attainable. Use your roofing shovel and tear absent the caps and top layer of shingles. Let the caps and shingles to slide down to the jacks. If they really don't slide down, carry them in excess of and throw them in the trash. Once the caps are out of the way, set the shovel underneath the best shingles and elevate. Get rid of lengths of approximately 3 feet at a time, making it possible for the taken off shingles and particles to slide down to the jack under.
5. Work Down
Once you’ve completed a three-foot stretch of the roof, move down and proceed to operate downwards until finally you attain the jack.
6. Discard Frequently
The shingles are extremely weighty and even a sturdy jack will ultimately give way, or the pile of shingles will create up until they begin to slide over the jack and down to the ground underneath. When you have gathered a first rate variety of shingles, select them up a tiny quantity at a time from the jack, wander to the edge of the roof and toss them into the dumpster.
7. Take Care Around Flashing
Take care all around flashing. Some of the more hard sections could be saved and fixed where they are. This is not only more affordable but easier than making an attempt to exchange all of the metallic flashing by yourself.
8. Tear Shingles From The Roof Edge
Once you have cleared all of the shingles over the degree of the roof jack, get rid of the jack and loosen the edge of the remaining shingles using the shovel. Do not fully get rid of them or they could hurt your guttering and something beneath. After you have pried the edge of these shingles up and away from the roof, use your hands and pull them up a little piece at a time, and then throw these sections straight into the dumpster.
9. Scrape Away Ice and Water Barriers
You could discover a h2o or ice barrier under the shingles at the edge of the roof. Some will most likely come up as you take away the shingles, but some will remain, and you will have to scrape it free just before you can discard it. If you genuinely can not get it off, you can lay new underlay over the top.
10. Remove Valley and Vent Flashing
Use a bar and spot it under the edge of any valley flashing to pry it unfastened. Carry on to perform down the valley flashing right up until you have totally lifted it from the roof and then carefully get rid of it. You must replace all of this flashing and do not plan on preserving any.
11. Clean the Roof Down
As soon as the shingles are taken out, you will have the perhaps cumbersome process of nail elimination. If you utilised a roofing shovel, you should not have too several nails still left at this level, but if you used a fork, this could be very an endeavor in by itself. Use a broom to sweep debris and dirt from the roof and examine for any harm or any sections that need to have repairing or changing.
12. Button Up
Buttoning up indicates making use of water and ice limitations to the roof. This is accomplished at the roof edge and the barrier arrives in rolls. Attract a chalk line 36 inches from the edge of the roof and then use the barrier by lining it up with that line. This guarantees that it addresses all of the gutter flashings and provides the needed safety. Once in area, tack the top of the barrier with staples. As soon as almost everything is laid out properly, roll the barrier back again and get rid of the protective barrier from the adhesive layer and adhere it back again down.
13. Clean Out the Gutters
After the obstacles are in place, eliminate all your equipment and any other particles or products that are on the roof. Be positive to check out in the gutters, due to the fact if you depart a brush or some thing else in there, it is most likely to result in leaks when it subsequent rains.
Removing Shingles
Most roofing shingles have a lifestyle of close to twenty years, even though yours may want replacing in much less or much more time than this. If you can see the shingles curling up at the edges, this is a positive signal that they need to have changing and it is best to act faster relatively than later.
As soon as the old shingles have been taken out and the roof has been cleared it is time for new shingles to be laid. No quantity of ice barrier and tarpaulin can defend your roof from a downpour, so the reshingling needs to be done as soon as the previous shingles are down to avoid leaks and to make certain that the roof is retained in very good problem.
Do contemplate making use of skilled contractors if you want to be confident of the very best results, or if you are not self-assured working at this kind of a peak. If you really don't do a excellent task getting rid of the previous shingles, it can have a knock-on effect and leave a bad high quality end on any new roof set up.
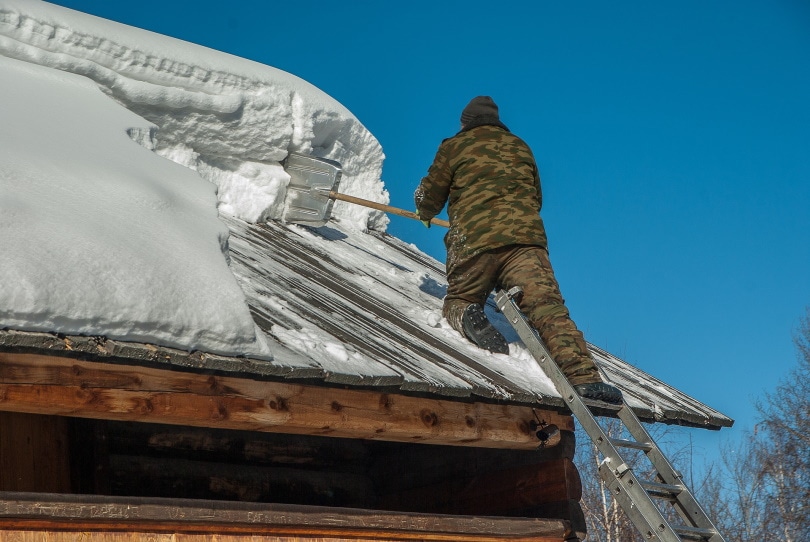
Featured Picture Credit: brizmaker, Shutterstock
Contents