Many thanks to all the diverse cracks and crevices, trim can be difficult to paint. Even so, anytime you are updating your property, it is frequently needed to paint the trim as well, especially if it is really out-of-date.
The good news is, we have gone in excess of all of the necessary methods to go away your trim with a sleek complete without having also significantly difficulty. Get a seem at each and every phase under to simply paint your home’s trim.
1. Shine a Light to Find Flaws
First, you will want to find all the flaws in the trim, which may possibly impact the paint occupation. You are going to need a suitably powerful handheld light. Then, shine it on the trim and search for flaws. If you find any, you should circle them with a pencil to make them simpler to discover later on.
These flaws could include paint harm, tough edges, and any other apparent blemishes.
2. Sand the Trim

Prior to you commence painting, you want a new and flawless floor. Simply because of the problems that have very likely produced on your current trim, you are going to need to sand the trim down. Concentrate especially on the flawed areas, particularly if the flaws are larger. Hopefully, you can sand them out and make the trim new once more. If you cannot, you could have to obtain a new established.
You will want a piece of sandpaper for scaled-down areas and spot-function. You will also require a rubber sanding block for the bulk of the sanding given that making use of only a piece of paper can be incredibly tiresome. Occasionally, you’ll want a sanding sponge that conforms to the curves of the trim, but it does rely on the trim style.
3. Use a Putty Knife on Tight Areas
For corners and other restricted places, you are going to have to use a putty knife to get rid of the old paint. Get as significantly as you can with the sandpaper 1st, and then get rid of almost everything added with a putty knife. You want to renew the particulars of the wooden even though you are at it, but really do not injury the wooden in the method.
4. Vacuum Thoroughly
Now that all the excess paint is taken out, vacuum the trim thoroughly to remove any dust and particles that are leftover from the sanding process. You may also want to get an previous, clean paintbrush to carefully eliminate any dust and debris from crevices and small particulars in the trim.
5. Prepare the Wood for Paint
Now, you can prepare the wood for truly painting. 1st, fill any holes or dents and key them for painting. If you really do not, then the paint will be particularly boring. Wipe down the wooden with a moist cloth if you’re using h2o-based paint or a cloth if you’re using oil-based mostly paint. You do not want the trim to be moist at all if you are portray with oil-based mostly paint, as this will cause the paint to not stick.
6. Paint the Trim
Subsequent, you merely paint the trim! You’d paint the trim just like you’d paint anything at all else. Even so, you must sand it between coats to make certain that the finish is smooth—it prevents the finish from getting grainy. You will most likely want a sponge to get into the crevices but depending on your trim, you may possibly not.
Right after you utilize the 1st coat of paint, let it dry for 24 hours and then flippantly sand it to sleek. Include a 2nd coat up coming, which may or may not need to have sanding. Be sure to cleanse the trim before every coat to ensure that dust and particles really do not get stuck amongst the paint layers.
7. Caulk All Gaps
For a skilled search, you will need to have to caulk any gaps, no issue how small they are. You will want a paintable mix to make sure that it looks like the relaxation of your trim. For the most professional seem, you’ll want to have a extremely expert caulking task. For that reason, it may possibly be best to follow a little bit.
8. Spot Prime if Necessary
In some situations, you’ll want to location prime in excess of any places that aren’t painting well. This assists seal discolored places, especially people triggered by crayons and markers. In many cases, these markings are tougher to get rid of than plain paint and they can bleed via the finished solution. Therefore, it is crucial that you reseal the trim as necessary.
Oil vs Latex-Based Paint
One particular of the far more essential conclusions to make is what variety of paint to use on your trim. Numerous pros use oil-based paint simply because it does not dry as quickly, which enables them far more time to apply the paint. Furthermore, they also amount out less difficult so the final task appears easy.
Nonetheless, there are several professionals to drinking water-based paints as nicely. For occasion, they are more environmentally friendly since they are drinking water-based, in addition, they are also less sticky and less complicated to clean.
You can make water-based paint execute a bit far better by including a paint conditioner. Floetrol is 1 this kind of brand name, but there are other people. These conditioners simply make the paint stream easier with out leaving all of the brush marks. Frequently, manufacturers of paint will advocate a particular brand of conditioner.
Can Beginners Paint Trim?
Painting trim may appear complex, but this isn’t always the case. As lengthy as you take it little by little and play your playing cards right, you can paint trim quite simply. It just takes a minor bit of know-how. With the appropriate data, you’ll be in a position to simply paint trim with out also considerably of a problem.
The primary dilemma is trying to keep the paint clean and spreading it about evenly. The sanding helps with this a minor bit, but you are going to want to get the paint easy as well. The sanding can not fix every little thing. We highly recommend that you apply portray if you haven’t already and get your time. Striving to pace by way of it can effortlessly direct to blunders. Newbies will want a lot more time to paint than a professional.
Painting trim does just take a lot of measures, but most of this is prep work. You may be tempted to skip on the prep work, but this is not recommended. If you do, the paint occupation will be much more hard and not appear almost as great. You’ll require to spend all the needed time and energy sanding the trim, as this is one particular of the more crucial actions. Key a lot more than you consider is necessary, and be confident to sand right after the 1st coat.
Be quite cautious about prepping the trim just before you really paint, and the approach will be a lot simpler general.
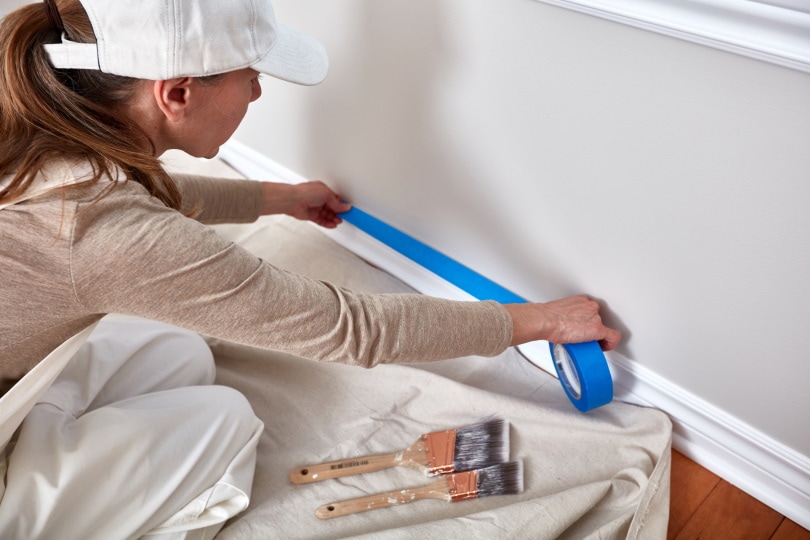
Featured Impression Credit history: Tomas Mikl, Shutterstock
Contents